Up next in 10

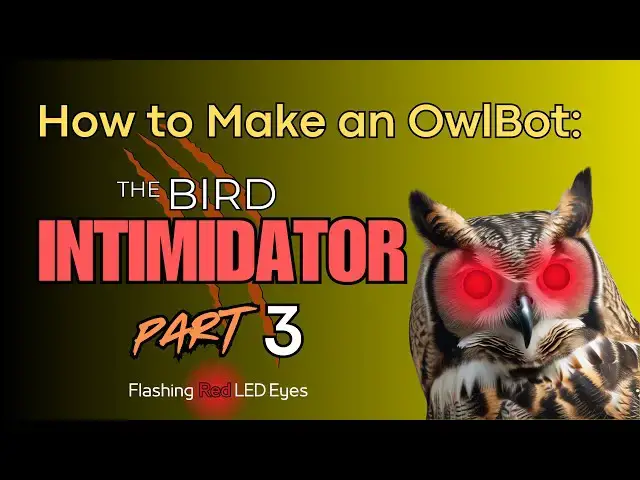
How to Make an OwlBot: The Bird Intimidator - Part 3: Flashing Red LED Eyes
Jan 20, 2025

This is the third video (Part 3) of a series of tutorials on how to build an OwlBot.
In this project we’re going to be performing the next step of what will eventually be the OwlBot. The OwlBot will be a device (robot/animatronic) that can be used as a bird intimidation tool to scare away pesky birds in the yard, around the house or barn, at restaurants, or in trees, bushes, and gardens. Hence, the phrase, “The Bird Intimidator”.
During the prototype process of making the OwlBot, I will be using the help of a previous project that was built, The Ultimate DIY 3220-Point Breadboard (TUDIY), to help in the prototyping process. I've provided the links to this project below. If you didn't make your own 3220-point breadboard, then don't worry! You can use just about any ole' generic breadboard you got laying around and still participate in this project. You can obtain everything you need to follow along on this build at the given links below.
Video for Our Website Page: "How to Make an OwlBot: The Bird Intimidator – Part 3: Flashing Red LED Eyes"
Page URL: https://motbots.com/owlbot-part-3-flashing-red-led-eyes/
Description: This is a supplemental video for a post made on our website.
Website: https://motbots.com
__________________________ PROJECT INFO __________________________
PARTS LIST:
https://motbots.com/owlbot-part-3-flashing-red-led-eyes/#Parts_List
TOOLS USED:
https://motbots.com/owlbot-part-3-flashing-red-led-eyes/#Tools_Used_in_Project
CODE FOR OWLBOT (Motbots):
Show More Show Less View Video Transcript
0:17
hello and welcome back to part three of
0:20
the albot project we are still currently
0:24
in the prototyping phase to create the
0:27
finished product of this guy in the last
0:30
part of the build we added the DF Player
0:34
Pro Mini MP3 player to our prototype
0:38
circuitry and what we did is we uploaded
0:41
an MP3 file of owl sounds to that DF
0:45
Player Pro Mini we made all the proper
0:48
connections to our prototype circuitry
0:52
on our breadboard and then we made the
0:56
proper connections if if I haven't
0:58
mentioned that yet and then we updated
1:01
the Arduino code in order to get
1:03
everything working as we needed it to be
1:07
so for this part of the project our goal
1:11
is to add the flashing red LED eyes for
1:18
our our albot uh prototype and what I'm
1:21
going to be using is a couple of Flatt
1:24
top clear lens red
1:26
LEDs and they happen to look like this I
1:31
will add a an image of
1:35
these uh later on so you can see them
1:38
better up close but I chose to use
1:43
these flat top clear lens red
1:46
LEDs H because I thought they might look
1:49
better when I plan on adding them
1:52
somewhere on the owl's face around the
1:56
eyes somewhere later on uh in the
1:59
project and I figured that having these
2:02
clear clear lenses like this would be a
2:07
little better less inconspicuous than
2:10
having your
2:12
typical rounded lens red LEDs that might
2:16
look like I don't know a couple of sore
2:19
thumbs sticking out of the face of this
2:21
owl or might even look like a couple of
2:23
ticks or something
2:25
but that's the reason why I'm choosing
2:28
these type of these you can choose
2:30
whatever type you'd like and I happen to
2:32
like the the flat the flat top design
2:36
that looked pretty neat to me so that's
2:38
what I'm choosing for mine you can
2:40
choose whatever type of LED you'd like
2:43
to uh put on your albot or even any
2:46
color you'd like to use I I just happen
2:49
to be using red Red's a common color in
2:51
LEDs so I'm going to put this guy off to
2:55
the side over here I don't need him
2:57
right
2:58
now but that's like I said I'm using the
3:02
Flatt top clear lens red
3:05
LEDs and this is going to be a pretty
3:08
short video there's not much to this
3:11
part in uh adding the ability for the
3:13
flashing red LED eyes for the
3:17
albot uh we just need a few more extra
3:21
components like I said we're going to be
3:23
using a couple of the LEDs all I need is
3:27
a couple of resistors I have happen to
3:30
be using 680 ohm resistors and those
3:33
will act as our current limiting
3:34
resistors for the LEDs and then I need a
3:37
couple of jumper wires and that's it and
3:40
then after we uh add those components to
3:44
our prototype circuit on our RedBoard
3:48
then we'll just need to update the
3:50
Arduino code from the last part of this
3:54
project and hopefully everything will be
3:57
working as it should so let's go ahead
3:58
and get into that step uh right
4:10
now okay as you can see I have the
4:12
breadboard set up here again I'm using
4:16
the ultimate DIY 3220 point breadboard
4:20
it's made from a previous project I did
4:23
you can check out all the details that
4:25
I'll leave in the description
4:27
below everything here is set up as
4:29
exactly like we left off in part two of
4:32
the albot project series all except for
4:35
this new uh label here or sticker here
4:38
where I have 2D introducing herself 2D
4:42
is just the
4:43
acronym for the ultimate DIY 3220 point
4:48
breadboard this piece right here and I
4:52
name it 2D for short because it's kind
4:55
of a mouthful to have to say the
4:58
ultimate DIY 32 20 point breadboard
5:00
every time I mention this thing so I
5:03
call her toy and here she is introducing
5:07
herself hi I'm toy anyways let's get
5:10
back to the project again I'm only going
5:13
to be
5:14
using a few components here for part
5:18
three of this albot project series I'm
5:22
using two Flathead clear lens red
5:28
LEDs I'll be using two 680 ohm resistors
5:33
and I only need two jumper wires and I'm
5:38
using orange jumper wires so let's get
5:41
right to it we're going to install the
5:44
LEDs
5:45
first and I'll just go ahead and leave
5:47
those resistors right there so I'm going
5:49
to take LED number one and what I'm
5:52
going to do is I'm going to place its
5:58
cathode on
6:01
the negative rail here of my 5vt power
6:05
supply the negative rail that we set up
6:08
earlier on in the
6:09
project
6:11
and I just need to make sure I'm going
6:14
to move the light
6:16
here I just need to make sure that I get
6:18
the orientation correct on the
6:21
LED and I need to the
6:25
negative lead is this straight leg on my
6:29
LED here and the way you tell that it's
6:32
the cathode or negative leg of the LED
6:36
is that that uh lead or leg attaches to
6:42
the larger lead inside the casing of the
6:45
LED and I call it the fat flag that just
6:49
helps me remember that that is the
6:50
negative lead of the LED so in my case
6:54
I'm taking the straight leg of this led
6:57
that's the cathode or negative lead of
7:00
the
7:01
LED I'm going to place it into a point
7:04
on the negative rail of the 5vt power
7:08
supply and I'm going to place the
7:11
anode into point a15 on my breadboard so
7:17
the
7:18
point that that I'm going to see if I
7:20
can zoom in
7:23
here the point that I put the positive
7:26
lead or anode of the LED into to is at
7:30
point
7:32
a15 and I'll give a close-up shot of
7:35
this here in a little bit after I
7:37
install the LEDs resistors and the
7:41
jumper wires so I'm going to zoom back
7:43
out for
7:44
now I'm going to grab my second LED and
7:49
again I'm going to take the cathode of
7:51
the LED place it into a point on the
7:54
negative rail of the 5vt power supply
7:58
and I'm going to place the anode or
8:02
positive lead of the
8:04
LED I think I'm putting it at point
8:08
a19
8:10
so just like
8:14
so now we're going to move on to the
8:16
resistors again I'm using 680 ohm
8:20
resistors and that is the color blue
8:24
gray brown if I can get it to focus
8:29
there we go blue gray
8:33
brown I'm going to put it down onto the
8:36
board
8:38
here
8:40
and again resistor orientation doesn't
8:43
matter I'm just I think I'm just going
8:47
to have my gold
8:50
bands face toward the
8:53
LEDs just to make it look a little nice
8:56
and neat and I'm going to place
8:59
my resistors I'm going to place one lead
9:01
of the resistor on point let's say
9:08
C15 if I
9:10
can see what I'm doing here I'm going to
9:12
use my
9:14
tweezers so I'm going to place one
9:17
resistor at Point
9:21
C15 in line with
9:23
the
9:25
resistor that I placed
9:28
on on the board first and then the other
9:31
lead is at Point
9:35
F15 so again I have my first led where
9:40
its anode is at point a15 I have this
9:44
resistor in line with that led at Point
9:48
C15 and the other leg or lead of the
9:52
resistor going across to point
9:56
F-15 I'm going to take my second
9:58
resistor
10:05
and I'm going to
10:09
place one lead at
10:13
Point C 19 and then the
10:17
other lead of the resistor at Point F
10:23
19 so again for this second resistor I
10:28
put it in line with the second LED we
10:31
placed into the breadboard so the anode
10:34
of the LED of the second LED is at Point
10:39
a19 the second resistor is in line with
10:42
that led at point
10:45
c19 and the other leg or lead of that
10:49
resistor goes across to point
10:52
f19 so now we have both the LEDs in
10:55
place both resistors in place now I just
10:59
need to make the connection from the
11:03
resistors to the Arduino so I'm going to
11:06
take one of my orange jumper wires I'm
11:09
going to place it in line with the first
11:12
resistor at Point
11:16
J5 I'm going to place the other end of
11:19
that jumper
11:20
wire to pin four of the
11:24
Arduino so pin four will be right
11:34
there and then I'm going to take my
11:37
second jumper wire I'm going to place
11:39
one end of the jumper wire in line with
11:42
the second resistor at point
11:46
j19 and the other end of that jumper
11:49
wire to pin five of the
11:54
Arduino like so
11:59
so let me get you a closeup view of this
12:03
and then uh that way that you could see
12:05
it a little bit closer okay I got you at
12:08
a close-up view now and I'm going to
12:11
kind of turn the breadboard a little bit
12:13
so we can see a little bit better so
12:16
just to review what we just did for this
12:18
part where we've added the two
12:20
LEDs I have this first led that I placed
12:24
in I have its cathode lead or negative
12:28
lead into the ne negative rail of the 5V
12:31
power
12:32
supply I have its anode or its positive
12:36
leg at point
12:39
a15 in line with that is our first 680
12:44
Ohm resistor it has one of its leads at
12:48
Point
12:50
C15 its other lead goes across over to
12:55
point F15 and then in line with that is
12:58
this first orange jumper wire that's in
13:01
line with that
13:02
resistor at point
13:05
j15 and it goes over to pin four of the
13:10
Arduino right
13:13
here you can see that that's this jumper
13:16
wire
13:17
here and then our second LED again we
13:22
put the cathode or negative lead into
13:25
the negative rail of the 5vt power
13:29
Supply that we set up in a previous part
13:32
of the albot
13:33
project and we have the positive lead or
13:37
anode of the LED going to point
13:41
a19 in line with that is our second 680
13:45
Ohm
13:46
resistor one of its leads is going into
13:50
Point
13:51
c19 going over across to point f19 and
13:57
then in line with that resistor is our
13:59
second orange jumper wire and one of its
14:02
leads is in point j19 and the other end
14:07
of this jumper wire goes over to pen
14:10
five of the
14:11
Arduino if I can move that so you can
14:14
see right here so that's this jumper
14:17
wire
14:18
here and that's it so the next step we
14:22
need to do is update our Arduino code so
14:25
that we can get these two LEDs to Blink
14:29
uh when motion is detected by the pier
14:32
sensor so the goal is we want the two
14:36
LEDs to start blinking at the same time
14:40
the MP3 player is playing the owl sounds
14:43
that we set up in part two of the albot
14:45
project we want those to go at the same
14:47
time when motion is detected by the peer
14:49
sensor we added in part one of this
14:51
project so let's go ahead and update
14:53
that code now and then we'll test that
14:56
code out and hopefully everything will
14:57
work
14:59
okay I have the Arduino code up here on
15:03
my screen so all we're going to do uh is
15:08
oops I'm going to update a few things in
15:11
the previous code that we had in part
15:14
two uh so if you need to check out what
15:18
all this other stuff is and the Arduino
15:21
code go check out uh part one and part
15:24
two of the albot build series as I said
15:29
we're just going to check out the things
15:31
that I've updated for the LEDs that
15:34
we've added to our prototype circuit for
15:36
the albot project and looking at near
15:40
the top of the code here we can see at
15:46
Lines 49 and
15:48
50 that there is a two new variables
15:55
here and one I've named left eye and
15:59
I've set it equal to
16:01
four and this is going to represent uh
16:06
the the One LED that's at Pin 4 on the
16:09
Arduino and I'm just arbitrarily saying
16:12
that that is the left eye and similarly
16:16
I've named the other variable uh ride ey
16:19
for the other LED and I've set it to
16:23
five which represents pin five on the
16:25
Arduino and again I've arbitrarily
16:28
called that the right eye next if we
16:31
look down in the setup we can see that
16:34
we've set up the pin modes here for both
16:37
the left and the right
16:39
eye and I've initialized those two
16:43
variables to be outputs because we want
16:45
to Output to the LEDs to turn them on or
16:50
off next we can
16:52
see uh these uh where I have initially
16:56
turn on or turn off both the guys so
16:59
initially we want to turn both of those
17:02
LEDs off or make sure that they're both
17:04
off when the program initially starts so
17:08
I've called the digital right function
17:10
for both the left and the right eye
17:12
variables and I've set both of those to
17:16
low just to make sure that when
17:18
everything first starts up and running
17:20
that the two LEDs are off because I
17:23
don't want them on soon as I uh put the
17:26
Power into the uh final albot project
17:32
now coming from lines 63 and 64 we're
17:35
going to jump down to line
17:39
121 which is inside the play Al function
17:43
so if I refer back up to our Loop
17:47
function originally we had it to where
17:51
uh this motion status variable it's it
17:55
is initialized to a to digital read
17:58
function and what it's doing it's um
18:01
listening for the peer variable to tell
18:04
us whether or not the pier sensor has
18:06
detected motion or not and uh if it does
18:11
detect motion then it'll jump down into
18:14
the is this if statement here this one
18:18
and inside this if
18:20
statement uh it'll check to see if the
18:22
pier state is low and within this if
18:27
statement there is is a third if
18:30
statement and what it's saying is if the
18:32
sound effects player is not playing then
18:35
we want to play the sounds and it calls
18:38
that play Al function again if this is
18:41
confusing to you right now this is what
18:44
we set up in uh Part Two for the uh
18:49
albot uh prototype circuit when we put
18:52
the MP3 player onto our prototype
18:55
circuitry this is what uh this
18:57
particular if St statement is for and
18:59
some of this other stuff we did all that
19:01
in part two and I'll leave uh the
19:04
information for that video down in the
19:06
description but anyways we can see that
19:09
we're calling the play Al function here
19:11
and inside the play Al function we see
19:15
here on line 121 that this call to the
19:18
blink eyes function is made and from
19:22
here it will jump down to the blink eyes
19:24
function this is a function that I
19:27
created and what what it does is that
19:30
once it gets inside here it delays or
19:33
waits for 250 milliseconds or a quarter
19:37
of a second and then immediately goes to
19:40
this first for Loop here and in this for
19:43
Loop I've initialized a variable called
19:47
I equal to zero and if I is less than 10
19:52
uh we want to go in the for Loop and
19:55
within that for Loop is another embedded
19:57
for Loop within the first for Loop and
20:01
here I have another variable
20:04
initialized uh it's called J and it's
20:07
initially set to four and if J is
20:11
greater than zero we want to go down
20:13
into this second for Loop and we want to
20:16
call the digital right function for both
20:19
the left and the right eye and what it
20:21
does is it turns the two LEDs
20:25
on to uh High so that is turning the
20:29
LEDs on both the left and right eye and
20:33
then we're going to wait or delay for
20:36
125 milliseconds or about an eighth of a
20:39
second and then we want to again call
20:42
the digital right functions for both the
20:45
left and right eye and set those to low
20:48
or what we want to do is now turn those
20:50
LEDs off and then again we're going to
20:54
call the delay function and we want to
20:56
wait about another eighth of a second
20:58
second and then it'll run back through
21:01
this second for Loop here after it's
21:04
already decremented the value of J so we
21:08
started at four it decrements the value
21:11
of J by one now when it comes back up J
21:15
will be equal to three 3 is greater than
21:19
zero again we'll go in here turn both
21:22
the left and right eye on wait an eighth
21:25
of a second turn both the left and right
21:29
LEDs off wait an eighth of a second and
21:32
do it all over again
21:34
until uh J is no longer greater than
21:37
zero and then it'll go back up to this
21:40
first for Loop and I is
21:45
incremented here to uh one this time
21:50
when it starts at zero when it comes
21:52
back up here again it'll increment it to
21:54
one or by one and as long as I is less
21:59
than 10 it will keep going back to this
22:02
second for Loop and this for Loop will
22:04
continue to go until it J is no longer
22:08
greater than to zero and then when it
22:11
isn't it'll leave and go back to this
22:13
for Loop and all of this occurs over and
22:15
over
22:16
again for some period of time just
22:21
enough time to have the eyes blink uh
22:25
long enough it's just uh you can change
22:28
these these variables to whatever you
22:29
want these happen to be the values that
22:32
I wanted to choose uh that I felt that I
22:36
wanted my albot eyes the red LED eyes to
22:40
be
22:41
blinking uh I don't recall exactly how
22:43
long this is but you can again you can
22:46
change the variables however you want
22:49
and then once all this is said and done
22:52
and it's finished it leaves both of the
22:54
for Loops it will leave this uh link
22:58
eyes function and go back up to line 121
23:03
where it will continue the rest of the
23:05
code so that's all that I've added to
23:10
the code from part two this is the
23:13
updated code for the albot for part
23:16
three of our albot Series so I'll leave
23:20
the link to this code to where you can
23:22
just copy it and paste it into your
23:24
Arduino IDE if you're following along in
23:27
this project to make things easier for
23:29
you so you don't have to type it all up
23:31
if you don't want to do that and now all
23:33
that's left to do next is just upload
23:36
this code into the Arduino I'll go ahead
23:39
and upload it now and then once that's
23:42
uploaded we'll go check out and see if
23:44
everything's
23:47
working okay I have you up close to the
23:51
Prototype circuit again and we've
23:54
already just uploaded the code the
23:57
updated code
23:59
for the
24:00
Arduino again what we've done for this
24:03
project is we've added the two LEDs that
24:06
will represent the albot red flashing
24:10
LED eyes we've added the two current
24:13
limiting resistors in line with those
24:15
two LEDs and we've connected our
24:19
components to the Arduino board to pins
24:22
four and five so I haven't turned
24:25
anything on yet because I didn't want it
24:27
to start making sounds and stuff while I
24:29
was talking I've already got it the
24:33
power plugged into the Arduino from 2D's
24:37
power supply the 9volt power supply over
24:39
here I'm going to go ahead and turn the
24:42
power on now and then we'll test to see
24:45
if we're making sound still and then now
24:48
hopefully having the red flashing LED
24:57
lights I'm GNA wave my hand in front of
24:59
the motion
25:02
sensor it picks it
25:08
up and now we have the owl sounds coming
25:12
from our speakers that we set up in part
25:14
two of the albot
25:17
project and we also
25:20
now
25:22
have I can get it to do it
25:25
again I think because it's weird
25:29
position
25:31
maybe and now we also have the red
25:34
flashing LEDs this will be the eyes of
25:38
our albot and the finished product of
25:40
the albot so it looks like our progress
25:44
is looking pretty good so far in part
25:46
one we added the pier sensor for motion
25:50
detection in part two we added the
25:53
speakers and the DF Player Pro Mini MP3
25:57
player to add owl sounds to our
26:00
prototype circuit and now we have our
26:03
two flashing red LED eyes for our albot
26:07
project I hope that you enjoyed this
26:09
part of the project and I really hope
26:12
that you stick around with me until the
26:15
completion of this
26:16
project I really appreciate you watching
26:20
and I will see you in part four of this
26:25
albot project
26:26
Series so remember keep at it and stay
26:31
motivated I'll see you next time
#Robotics