live_tv
Livestream Starting Soon
00
Hours
:
00
Minutes
:
00
Seconds
Up next in 10

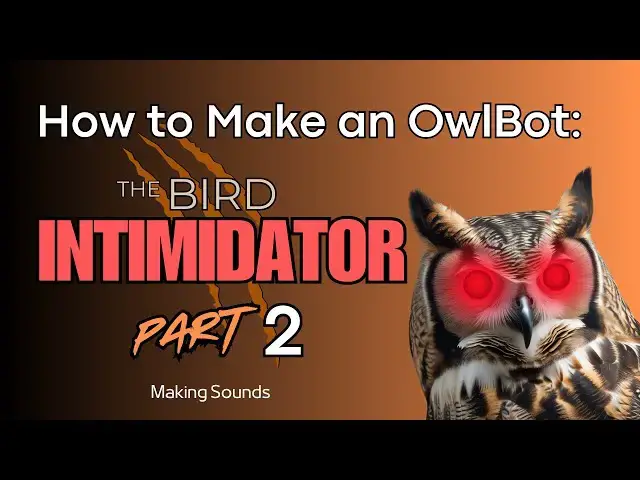
How to Make an OwlBot: The Bird Intimidator - Part 2: Making Sounds
Jan 7, 2025

This is the second video (Part 2) of a series of tutorials on how to build an OwlBot.
In this project we’re going to be performing the next step of what will eventually be the OwlBot. The OwlBot will be a device (robot/animatronic) that can be used as a bird intimidation tool to scare away pesky birds in the yard, around the house or barn, at restaurants, or in trees, bushes, and gardens. Hence, the phrase, “The Bird Intimidator”.
During the prototype process of making the OwlBot, I will be using the help of a previous project that was built, The Ultimate DIY 3220-Point Breadboard (TUDIY), to help in the prototyping process. I've provided the links to this project below. If you didn't make your own 3220-point breadboard, then don't worry! You can use just about any ole' generic breadboard you got laying around and still participate in this project. You can obtain everything you need to follow along on this build at the given links below.
Video for Our Website Page: "How to Make an OwlBot: The Bird Intimidator – Part 2: Making Sounds"
Page URL: https://motbots.com/owlbot-part-2-making-sounds/
Description: This is a supplemental video for a post made on our website.
Website: https://motbots.com
__________________________ PROJECT INFO __________________________
PARTS LIST:
https://motbots.com/owlbot-part-2-making-sounds/#Parts_List
TOOLS USED:
https://motbots.com/owlbot-part-2-making-sounds/#Tools_Used_in_Project
CODE FOR OWLBOT (Motbots):
Show More Show Less View Video Transcript
0:03
so I'm going to turn it on we can see all the lights
0:11
on and then I'm going to wave my
0:25
hand and we hear the owl sounds come out
0:38
welcome to how to make an albot the bird Intimidator this is part two making
0:44
sound we left off in part one by starting off our prototype building
0:51
process by using a peer sensor connected to an Arduino Uno in order to provide
0:58
the functionality for the initial steps of our prototyping process to make this
1:05
guy to be able to detect motion and we program the functionality
1:11
within the Arduino chip uh to detect that motion and then to print out to the
1:18
serial monitor for us whether or not that motion was detected so here in step
1:25
two now we want to add the functionality to be able to play an audio file that uh has owl sound
1:34
stored on it because we're making an ow bot and we want our owl to make some owl
1:40
sounds so the goal for the end of this part of the prototyping process is
1:48
to detect motion and when motion is detected to play owl sounds for us and
1:54
and in order to do that we're going to be using an MP3 player and I'm
2:00
using the DF robot brand MP3
2:06
player this is a newer version this is called the DF Player Pro Mini MP3 player
2:14
and this is what it looks like I'll have some close-up images of it uh shortly
2:20
but here's the box that it came in and you can see there is the part number
2:25
it's dfr 0768 and I'll leave uh the links to get
2:35
yourself one of these if you'd like in the description below and just so you
2:41
know it is an affiliate link so any purchases
2:46
made I suppose that you know there's a benefit for us out of that so anyway we
2:55
are going to be using this uh particular style of MP3 player there is an older
3:04
version an alternative if uh you already have one or prefer to use the the older
3:11
version which is just a little bit cheaper than this one it's I think the other one is like five bucks or so this
3:17
one's about $8 or so but it is the DF
3:23
uh DF player mini and the that
3:29
particular variation uses an SD card in order to store the MP3 file or other audio files
3:37
onto it this newer version of the DF robot DF
3:45
player uh MP3 player uses a uh chip on
3:51
the board here and uh it just directly stores those files onto the board here
3:58
these uh boards are really small they're like 1 in by 1 in so the form factors on
4:05
these are quite small and will work perfectly for when we start putting
4:11
components in our albot later on in the build uh what we'll do is we'll jump
4:20
right into it you can see here that I've already soldered the pins on my MP3
4:28
player when you get these in the Box they come with the header pin but
4:34
they're not soldered on yet and the header pens that they provide uh they're they kind of give you
4:41
extra and we'll have to trim those and then solder them on so for step one of
4:49
the process we'll have to trim them to fit and then for step two we'll solder
4:55
them on and in step two I'll show you a little trick on how to solder header
5:01
pins on these types of little boards like this uh to make it easier to solder
5:07
them on and and to get them straight and uh make it easier to solder on it's just
5:14
a little trick so we'll jump right into those two steps and right
5:20
now okay as I said in part one of this
5:26
build series for the albot project I'm using using the ultimate DIY 3220 Point
5:34
breadboard here to prototype the albot this was made from a previous
5:41
project if you'd like to build your own uh ultimate DIY 3220 point
5:49
breadboard I'll provide all the information to both our website at mbots
5:55
dcom as well as the playlist for the build
6:01
series uh for creating this I'm going to call it 2D that's Tu DIY for
6:10
short uh because that'll save me from having to say the ultimate DIY 3220
6:17
Point breadboard each time I talk about this board so uh also if you don't have this
6:26
or don't care to make your own 2D then you don't have to have one to be
6:32
able to uh try out this project uh you can just use any generic
6:38
830 Point breadboard as I mentioned in part one and on the website or you can
6:43
use uh any other branded 3220 point
6:50
breadboard so let's move on to what we're going to be doing for part two
6:56
here as I said we're going to be uh adding the uh MP3 player to our prototype in
7:06
part one we set up our power uh to the breadboard from our
7:12
9volt battery power supply we also set up uh the ability for the the power to
7:20
be connected to the Arduino later on and then we also had our Arduino and uh
7:29
connect made all the connections from our Pier sensor to the breadboard and to the Arduino so now we're going to be
7:36
adding the MP3 player to our breadboard and making all the necessary
7:42
connections as I mentioned we're using the DF robot DF Player Pro Mini MP3
7:52
player let me get my
7:57
tweezers here's a a closer look at
8:03
it this is the top side and this is the bottom
8:11
side if I can get it to focus that's the
8:17
bottom that's the top and like I
8:22
mentioned this is the newer version this is the DF player pro version and it
8:28
stores the a AIO files directly to the board here on the chip and all you need
8:34
to do is just make a connection from the USB type-c uh Port here and connect it
8:42
to your computer and then you can transfer files directly just by dragging
8:47
and dropping to the driver file of this board on your computer and that's it so there's no SD
8:55
card like the older version of the MP3 player from DF robot it's called the DF
9:03
player mini so you can use the DF player mini if you'd like but for this project
9:08
I'm using the DF Player
9:14
Pro so you can see I've already soldered on the pins to this board when you
9:21
receive it in the Box uh the pins are not pre-soldered for
9:27
you at least they weren't for me so for our first couple of steps we're going to
9:32
have to prep this board by trimming the header pins that you receive in the Box
9:38
because the ones that they give you they kind of give you extra uh pins so we'll
9:44
have to trim those and to get them to fit on the board because there's uh six
9:50
pens on each side of the board here and then uh after we trim them we'll solder
9:58
them to the board and in that'll be in step two so and in
10:03
step two I'll show you a little trick on how to solder these header pins to this board or any other board that you might
10:11
be uh using for this project or any other project that you do in the future
10:16
and the little trick that I'll show you is a real simple trick in order to get header pins like this to fit on straight
10:23
and to make everything easier to put in place or to make it easier to solder
10:30
everything in place so I've already pre-recorded the steps to do that obviously as you can see the again the
10:38
headers are already on here soldered so you can check out that pre-recorded
10:43
video I'll leave it in the description and it's a quick little video that shows
10:49
you those two steps in order to get everything set up for this board to
10:54
place it on our breadboard so step one is trimming the
11:00
header pin step two is talking about the trick to solder the header pin onto the
11:05
board and then step three will be to solder the header pins to the DF Player
11:11
Pro so right now we'll just pick up on step four so after you've watched that uh
11:21
video for steps 1 through three we're now ready to go to step number four
11:27
where we will be seeding the DF Player Pro onto the
11:32
breadboard so in part one we connected the pier sentor to the breadboard into the power rail as we can see here and to
11:40
the Arduino now that we have the DF Player Pro ready we can now seat it onto
11:46
our breadboard and make all the necessary connections that we need to using some jumper wires so where I'm
11:53
deciding to place the DF Player Pro on my breadboard it will be on this side
11:59
or this uh breadboard on this side of the the on this side of 2D and like I
12:06
mentioned on the website for step four I'm going to be placing the left side
12:13
pins the six pin on the left side I'm going to be placing them
12:19
onto points B6 through b11 and then I'm going to place the right side pins
12:25
there's also six of them into points h 6 through h11 so I'll go ahead and line
12:32
them
12:39
up placing the left side pins onto points
12:45
B6 through b11 and the right side pins through points
12:51
H6 through h11 and I'll go ahead and
12:56
bring this up a little closer so we can see a little
13:02
better so I have the left side pin on B6
13:07
through 11 and the right side pins on H 6 through
13:13
11 so now that we have the MP3 player set on our breadboard we can now move on
13:21
to step five where we will be making the connections to the DF Player Pro uh to
13:27
power so to to make those connections I'm going to be using a red jumper
13:33
wire and a black jumper wire and I'm going to start off by
13:39
taking the red jumper wire and I have one here that I have kind of
13:46
bent in shape in order to try to get it to uh be placed where I need it to go so
13:54
I'm going to take the red jumper wire and I want to place one side
13:59
into the VN pin which in this case where I have my DF Player
14:06
Pro in place on the breadboard is going to be at Pin or at Point
14:15
A6 so that's my VN and I place the other end of the jumper wire uh on the
14:23
positive rail of the power supply uh the 5vt supply coming from the Arduino that
14:31
we set up in part one of this prototype build on the
14:36
breadboard next I'm going to take my black jumper wire again I've just taken
14:42
a black a jumper wire in this case it's black and I've bent it into shape to get
14:47
it to go where I need it to and I'm going to place one end of the jumper
14:54
wire at the ground pin or in line with with the ground pin on the DF Player
15:02
Pro and in this case that's at Point
15:09
A7 on the breadboard and I plac the other end of that jumper wire on the
15:15
negative rail of the 5vt uh Supply that we
15:20
established in uh part one of the series so let
15:27
me show a close up of this so we can see what's going on
15:32
here we have the red jumper wire at VN
15:37
and the positive Supply and we have the black jumper wire going to the ground pin of the DF Player Pro and the other
15:46
end going to the negative Supply so that's step five done so next is Step
15:57
six step six we will be connecting the DF player Pros RX and TX pins or its
16:04
receiving and transmission pins now we could connect directly to
16:10
the TX and RX pins of the Arduino but this could cause a potential issue the
16:18
Arduino Uno only has one cereal port and
16:23
those are the RX and TX pins that are right here on the board the arduinos USB
16:29
port and the serial Port are tied together so what this means is that when you're trying to compile code and upload
16:36
it to the Arduino from its USB port here and you have arduino's RX and TX pins
16:44
it's serial Port connected to something else so let's say if we were connecting
16:50
pins directly to the RX and TX pin on the the Arduino board from the RX and TX
16:57
pin on the DF Player Pro we could run into issues when uploading our code we'd
17:04
have to remove the wires on the RX and TX pens here to the serial Port each
17:11
time we need to load the code to the Arduino and then we'd have to replace them back in again uh each time we would
17:18
upload code to the Arduino so we don't want to do that so in order to get
17:23
around this uh this issue is we're going to be
17:29
uh tying into pens two and three on the Arduino instead and then we'll we'll put
17:35
into the code later that we're using pens 2 and three as our RX and TX pin so
17:44
what we'll do is we'll connect the RX and TX pins coming from the DF Player
17:50
Pro and make the connections from those two pins to pin two and three so what we're going to do is we're going to
17:58
connect the r RX pin on the DF Player Pro using a
18:03
jumper wire and connecting the other end of the jumper wire to pin two on the
18:08
Arduino so what we'll do in the code is we'll say that pin two will be our TX
18:14
pin because we need the RX pin from the MP3 player to go to the TX pin that will
18:23
designate as pin two later in the code on the Arduino and similarly we need to make a
18:32
connection using jumper wires from the TX pin of the MP3 player and connect it
18:39
to the RX pin or pin three which we will designate as the RX pin and code later
18:47
on the Arduino so I'm going to be using an orange and blue jumper wire
18:55
these are maleo male jumper wires meaning that there's
19:00
pens on each end of these jumper wires and I'm going to start by using
19:07
the blue jumper wire and I'm going to connect one in of it to point
19:13
A8 and A8 in my case is the RX pin on
19:18
the DF Player Pro MP3 player I'm going to take the other end of this blue
19:25
jumper wire and I'm going to place it into pin in two of the
19:34
Arduino like so next I'm going to take the orange
19:40
jumper wire and place one end of the jumper wire into pin uh into pin three of the
19:48
Arduino so that's the one next to pin two here and I'll take the other end and
19:53
I'll place it at the TX pin of the DF Player Pro
19:59
and that's at Point A9 on my
20:04
breadboard so I'll show you a closeup of what we've got going on so
20:10
far we have the blue jumper wire going from the RX pin of the DF Player
20:16
Pro and going to pin two of the Arduino if I can angle it
20:24
just right it's upside down but you can see it's going to pin two and then I have the orange jumper wire going from
20:31
the TX pin of the DF Player Pro and the other end going to pin three on the
20:36
Arduino and again we'll put into code later that pen two will be the TX pen on
20:44
the Arduino and Pen 3 will be the RX pen on the Arduino and we'll set that all up
20:49
in code later when we update our code from part one of this prototype build
20:55
for the elbot series so now what we need to do is we need to move on to step seven and step seven is loading an MP3
21:03
file onto the DF Player Pro so for that step for step seven I'm going to refer
21:11
you to the website where I explain in detail on how to load an MP3 file onto
21:19
the DF Player Pro and it's very easy to load a file on onto the DF player uh Pro
21:27
Mini MP3 play ler as I mentioned before all you need is some kind of data
21:33
transfer cable that has a USB type c end and the other
21:39
end uh of whatever type USB connection you need to make to your specific computer
21:47
and you'll go to whatever uh website you prefer to go to or whatever sound you
21:54
prefer to use I provide the AL sound I'm using for this project on the website
22:01
I'll leave the description to everything you need down below but whatever file you're going to
22:08
be using I'm using an MP3 file uh you can use different audio files and I'll
22:14
leave a link to DF robots site for this DF player uh Pro Mini MP3 player and
22:21
it'll tell you what types of files you can use but I'm using an MP3 file that has Al sounds on it that I found the
22:29
file at freesound.org all that information will be left in the
22:35
description and on the website but all you need to do is have your MP3 file in
22:40
your folder on your computer and have the folder of the driver file for the
22:47
MP3 player and basically you just drag and drop that file into the the file for
22:53
the DF Player Pro and that's it that file should be ready to go to use you
22:58
can just unplug the USB cable to the MP3
23:03
player and it's got the file set in here and it's ready to go and then later in
23:09
in the process of setting up uh the prototype for sound for step two the
23:16
current uh step that we're on in this build series will put into the code the
23:23
functionality to play that file uh using our Arduino for when motion is detected
23:31
by the pier sensor so assuming that you've gone to the website and followed the instruction for step seven to upload
23:39
the file to the MP3 player and you've already got that set up we're now moving to step 8 where we're going to connect
23:46
the speakers to the DF Player Pro I'm using
23:53
two 3 watt 8 ohm speakers they're just a couple of basic speakers
23:59
and I'm using two because the MP3 player pro has the ability to Output to two
24:05
speakers unlike the older version of the MP3 player from DF robot the DF player
24:13
mini I only had capability of outputting to uh one speaker I believe so I'm using
24:20
two speakers for this project and what we're going to do is we're going to make connections using
24:27
jumper wires to these speakers because these speakers have these jst connectors
24:34
on them and I've already got the jumper wires uh installed in each of these but
24:42
my speakers have these jst connectors on them and for prototyping purposes I'm
24:47
just going to take uh an orange and a yellow jumper wire and I'm going to these are maleo
24:55
male in jumper wires and I'm going to just shove those pins into the holes of the jst connector on these speakers uh
25:03
just to make an easy connection to the breadboard that's all I'm going to do so what I'm going to do is I'm going to
25:08
take an orange jumper wire and place it into the
25:15
hole connecting to the red wire of the speaker that'll
25:21
be my positive and I'll take a yellow jumper wire and place it into the hole
25:26
connecting it to to the black wire of the speaker and that's considered my negative and I I've already done the
25:33
same for this speaker as well I have the orange jumper wire going to the red wire
25:38
and the yellow jumper wire going to the black wire so I have both of my speakers
25:44
ready to connect to the DF Player Pro I'll set that one
25:51
aside and what we'll do is we'll take the other ends of the jumper wires the orange and the yellow wires and we'll
25:56
begin making our connections for the speakers to the MP3 player so what I'm
26:03
going to do is I'm going to take the orange the other end of the orange jumper wire for this speaker it's
26:08
connected to the red wire remember and I'm going to connect it to the r plus
26:14
pin on the MP3 player and for me that is going to be
26:22
pin I9 in my case where based on how I've
26:27
placed the MP3 player on the breadboard so I have the orange jumper wire coming
26:33
from this speaker it's connected to the red wire of the speaker and it's going to the
26:40
r+ pin on the DF Player Pro and it's
26:46
going into pin I9 in my case now I'm going to
26:53
take the other end of the yellow jumper wire and remember
26:58
we have it connected to the black wire on the speaker I'm going to take the other end and connect it to the r
27:07
negative pin on the MP3 player and that happens to be at Point
27:18
I8 so if I bring it closer I can show you what we have so
27:25
far is that we here's the speaker here's the black the red and black wire
27:31
the red wire goes to the orange jumper wire and the orange jumper wire is going
27:37
[Music] to the r+ pin and then the yellow jumper wire is
27:44
connected to the black wire and the other end is connected to the r minus
27:49
pin on the MP3 player so now we're just going to repeat
27:57
this process for the second speaker and here that
28:04
is so I'm going to take the orange jumper wire for this speaker it's
28:11
connect one end is connected to the red wire of the speaker I'm going to take the other end of the orange jumper wire
28:17
and I'm going to place it at the l+ pen
28:22
of the DF Player Pro Mini MP3 player and that happens to be for
28:29
pin 11 or excuse me at Point i1 on my
28:36
breadboard and I'm going to take the yellow jumper wire where we connected
28:41
one end to the black wire of the speaker and I'm going to take the other end of
28:46
that yellow jumper wire and place it at the L minus pin of the DF Player
28:56
Pro and that is is the L minus pin and that happens to be at point I 10 on my
29:03
breadboard so if I bring it closer we can see that
29:09
oops this speaker here that we just connected is connected to points l+ and
29:17
L minus I have the orange jumper wire which is connected to the red wire of
29:23
the speaker and the other end of that orange jumper wires at Point at Pin L
29:28
plus and we have the yellow jumper wire which one end is connected to the black
29:34
wire of the speaker and the other end of the yellow jumper wires connected at the L minus pin of the DF Player Pro Mini
29:42
MP3 player so we have both of our speakers
29:50
connected to the DF Player Pro Mini MP3 player
29:58
and that is it for step
30:07
eight okay once you've already uploaded the MP3 file onto the DF Player Pro MP3
30:13
player and have already connected the speakers to the albot Prototype on the
30:20
breadboard we're now ready to move on to programming the Arduino or updating the
30:26
code in the for the arduin wio that we did from part one of this albot build
30:33
series I already have the website up on
30:38
my browser here and I'm at the page for how to make an albot for part two and
30:44
what I want to do is I want to scroll down to the table of contents here and go to programming the Arduino to make
30:50
sound and that'll take me down here where we can see the code here and what
30:56
I want to do is instead of typing all this by hand I
31:02
would just want to copy it by pressing the copy button and then I'm going to go back to
31:08
the Arduino IDE here you can see that I have it up here on the screen already I've already saved it as albot part two
31:18
you can save it however you like but in keeping with consistency on this build
31:23
series I'm going to have mine uh code code saved in this format
31:30
like this so what I'm going to do is I'm going to select all this and delete it
31:38
and I'm just going to paste the code that I copied from the site right into
31:45
the page here and then now what I'm going to do is I'm just going to
31:52
save and it's ready to go so once I connect my Arduino to my computer
31:58
I can upload it to the Arduino and then we can move on to the next
32:09
step so what we can do now is just kind of go over the code here the new stuff that's in here so what we've added to
32:16
our code from part one of the build of the albot and prototyping the albot
32:22
we've added this new include here the include DF robot df1 1201 S.H
32:32
and this is just for the DF robot DF Player Pro Mini uh MP3 player it's the
32:38
library for it so our MP3 module has its own library that we need to include in
32:44
our code the next thing that I've added here are these two variables here for
32:50
the RX in TX or the receiver and transmission depins on the Arduino
32:58
so the RX here is assigned to pin three on the Arduino so we can see here it
33:04
says this is what we'll designate as the RX pin on the Arduino this is not the RX
33:11
pin for the uh DF Player Pro and similarly this uh TX variable
33:19
that we've assigned to pin 2 here this is what we'll designate as the
33:26
TX pin on the Arduino not the MP3 player
33:31
so next we've created a new uh serial object here the software effects serial
33:38
here we're using software serial and we're passing in the two arguments for
33:44
the variables we just created up here above the RX and TX variables so what we're doing is we're creating an object
33:51
for our sound effect cial which is saying which pins to use for receiving
33:56
and transmission so basically this is what's used to communicate with the DF Player Pro module that we have in our
34:04
current prototype setup so moving moving along we have an instance of an object
34:11
here using the DF robot object here which we've named sound effects player
34:17
and we'll use the sound effects player object when referring to the sound effects player or the MP3 player now we
34:24
want to look down into the setup and here we can see that we've added a couple more pin modes here one for the
34:31
RX and one for the TX the two variables we created up here and we're saying that
34:38
the RX will be an input and the TX will be an output so for the RX we said this
34:45
is the RX pin on the Arduino that's our receiving pin for the Arduino so it
34:50
needs to be an input because it's receiving information and then for the pin mode for the TX this is our
34:58
transmission pin for the Arduino and it needs to be an output pin because it's
35:04
transmitting data out from the Arduino looking at the serial. begin or the
35:09
serial setup that we have here previously we had a b rate here for 9600
35:16
which is the typical B rate that you would use for most instance instances
35:21
but I found that when I initially tried to use the MP3 player and look for for
35:28
uh output to the serial monitor using a 9600 B rate I was getting gibberish
35:33
printed to the serial monitor so I had to look up on DF robots website for the
35:41
DF Player Pro Mini MP3 player to see if I could find if there was a specific B
35:48
rate that I needed to use and I saw in some of their example code on their
35:53
website that they were using a b rate of50 15200 so I added that in my own code and
36:01
ran it again and I was able to get the output that I was looking for to the
36:07
serial monitor so that's why I'm using this B rate of 115200 in order to be
36:13
able to use the serial monitor for debugging purposes moving along we can see that we have an instance of the
36:19
sound effects serial that we created up here where
36:25
we're also using the same B rate value for it and this is just for setting up
36:31
the Cal for sound effects cereal and then here we can see that we are
36:37
basically just telling the sound effects player to use the sound effects serial so remember that uh the sound effect
36:45
serial said which pins to use for the transmission or TX pin and receiving for
36:52
the RX pin for the Arduino so the sound effects play
36:58
refers to the MP3 player so what we're really saying is is that we want the MP3
37:04
player to listen for signals from the Arduino serial Port that we made from pins two and three so pin two on the
37:12
Arduino is the uh TX pin and pin three on the Arduino is the RX pin so now if
37:20
we look down here we're just doing the setup for the player itself the MP3
37:26
player so so these are just some built-in functions from the uh Library
37:32
up from up this Library here and remember we created uh this object here
37:38
called sound effects player from that library and here we're just doing an
37:43
initial setup using the built-in functions from the
37:49
library that we're using so we're saying here sound effects player. setv which is just us set
37:57
setting the volume for the MP3 player and here I've used a value of 30 and I
38:05
think the range goes from 0 to 30 where Zer is the lowest volume setting and 30
38:11
is the highest volume setting here we're calling the switch function and we're
38:16
basically saying that we want the sound effects player to be in music mode next I have the set prompt set to false and
38:24
what this is is that when you initially turn on the MP3 player there's a voice
38:30
prompt that comes on and I didn't want to have that play When the MP3 player is
38:36
powered on so in order to silence the voice prompt at the start we'll just put
38:43
the set prompt to false and then here I have a delay for 2 seconds or 2,000
38:48
milliseconds in order to allow for everything to calibrate and then here
38:54
we're just setting the play mode for the sound effect effect player to uh all
39:00
cycle or we want it to repeat all so in this case we just have one file uh the
39:08
AL sounds MP3 file that we loaded to the MP3 player and it's just going to allow
39:15
that to continually repeat if you had more than one file it would just repeat
39:20
everything uh in your mp3 player so moving on to inside the loop so before
39:27
before we get into the loop I'm going to go back up here to the top of the code so we can look at
39:32
the variables that we initiated back in part one of the albot project and here
39:39
we see that in part one we created this motion status variable and we
39:45
initialized it to be low and we also created this peer State variable also
39:51
initializing it to be low the motion status was for our current motion status
39:56
or signal pin read it's can either be low or high and again we're initializing
40:01
it to be low and the peer State variable is the state of the peer signal pin so
40:07
it's either high or low and initially we set it to low so I just wanted to go over those two real quick in order to
40:15
refresh our memory on those two variables that we created in part
40:20
one and going back down to the loop starting at the motion status
40:28
variable here we're Now setting it equal to a digital read meaning that we're wanting to read the digital pin of the
40:34
pier sensor here and that was pin 12 on the Arduino and then if that motion status
40:41
is high or it's reading a a signal coming from that digital pin then we
40:46
want to go in this if statement and here it's asking uh if the pier state is low
40:51
we want to go in here and we initialize the pier state to be low so in usually
40:57
when the for Loop is or when the code enters the Ford Loop and if there's
41:03
motion being detected by the pin 12 then it's going to go in this if statement
41:09
here because motion status is high and then because we initialized Pier state
41:15
to be low it will go into this if statement it's going to print out that motion was detected to the serial
41:22
Monitor and then we're going to change the state of peer state to high
41:28
and then here we have the if statement uh asking whether or not the sound effects player is playing so here
41:35
it says if the sound effects player is not playing that's what this little
41:41
exclamation mark here is for so if the sound effects player is not playing is
41:47
basically what it's saying then we want to start playing the owl sounds from the
41:52
MP3 player if the motion status uh was still low meaning mean that there wasn't
41:57
any motion detected it wouldn't go in this if statement so it would go to this else statement and here if that Pier
42:06
state was high it would tell us that no motion was detected set the pier state to low and then if the sound effects
42:15
player is playing then we want to pause the ow sound so this would go to the
42:20
pause owl uh function which we created this function we'll take a look at and
42:27
just a minute and we also create this play out function which which we will look at next so as I stated if we if the
42:35
code were to reach this part of the code where it wants to play the owl sounds if
42:40
the sound effects player isn't playing it would jump down to this Play
42:47
Owl function here and this is a function that we create ourselves and I've named it play owl and
42:54
in here we have a variable called file number and here we're getting the current file
43:00
number within the MP3 player and we're setting it to the variable file num each
43:07
file in the MP3 player will have its own value for this project we're only using
43:13
one file and that's the ow sound file that we loaded onto the MP3 player from
43:19
before as I mentioned earlier you could have other files that play other sounds on your mp3 player module so here we're
43:27
again using one of the built-in functions for the DF robot library and
43:35
here we have an argument of one and what we're saying here is is that we want to
43:41
play the first file on the MP3 player and the numbers are arranged according
43:46
to the sequence of files copied onto the udisk on the MP3 player module and then
43:52
here we want to set the play time to zero and what this does is it starts the
43:58
file 0 seconds in or at the very beginning and then we want to start
44:03
playing the sound effects by using the built-in function start so now we come
44:09
to this for Loop here and this is just an easier way for me to have the AL
44:15
sounds play for about 10 seconds so the for Loop saying that uh initially this I
44:22
variable is set equal to 10 and then if I is greater than than zero then each
44:28
time we go into this for Loop we want to decrement this value of I and what we
44:34
want to do is we want to print out to the serial monitor the value of I so initially it's going to print out the
44:40
value of 10 because we initialized I to B1 we want to wait for 1 second and then
44:47
it'll jump back up here to the for loop after it's already decremented the value of I by one so now after the first Loop
44:57
now we're at the value of nine it'll print at it'll print out nine to the
45:02
serial monitor wait a second go back up to the beginning after decrementing the
45:08
value of I so now the value of I is 8 it'll print out the value of 8 to the
45:13
serial monitor wait a second and it'll keep doing this until the value of I is
45:20
no longer greater than zero so once I is at zero it will leave this for Loop
45:27
and this process takes approximately 10 seconds so basically we're just buying
45:33
some time here approximately 10 seconds as I said until we get down to this line
45:40
here where we're calling the pause owl function and the pause owl function here
45:45
is a function that we make I've called it pause owl and in here we're telling the sound effects player that we want to
45:51
pause the player so that's basically all that we've added to
45:57
our previous code from part one of the albot project this is the functionality
46:03
that we have now to be able to use the MP3 player that we've added to our
46:09
prototype so next what we need to do is just compile this code and upload it to the
46:19
Arduino Okay And discussing about compiling and uploading the code to the Arduino once we plug in the the Arduino
46:27
to our computer we of course need to make sure that we uh go up to tools uh I
46:35
know you can't see it on the screen right now but we go up to tools and make
46:40
sure that uh we go down to board and uh Arduino AVR boards and make sure that
46:48
you check the board that you are using in this case for this project we're using the Arduino Uno and then again I
46:56
go up to tools again I'm sorry you can't see it on your screen right now but I go up to tools and then this drop down menu
47:04
uh comes down and then the next we would need to go to Port and then choose the port where your Arduino is located at
47:12
and in this case this is my port for the Arduino Uno and I make sure I check that one and you can see down here at the
47:19
bottom that it shows that the Arduino Uno is uh showing up in in the uh ID
47:28
uh I'm using a MacBook Pro to compile and upload the code right
47:35
now and you may come into a couple of problems if you've never compiled or
47:41
uploaded code from the Arduino IDE to an Arduino before you might run into a
47:47
couple of Errors a couple of different errors so the first error I want to discuss is an error that you might
47:53
receive and I have a I pull up my browser uh you might see an error that
48:00
says something about a bad CPU in executable and right now I'm at
48:07
arduino's uh website and I I search this
48:13
specific uh error that I had received and uh what it may be is these
48:21
uh newer uh Apple MacBook computers that use the Apple silicon instead of the
48:28
Intel CPUs you may need to install what's called Rosetta onto your computer
48:37
and right here on this page on the Arduino website it gives you the
48:42
instructions in this case to manually install Rosetta so all you need to do is
48:48
just open your terminal and then in your terminal you
48:53
would just need to type in this software update D- install D rosetta in my case
49:02
I've already installed this on my uh MacBook Pro so that's already been done
49:08
but all you would do is you just type it into your terminal window and then press enter and then you you'd have to accept
49:16
the license agreement with Apple so basically you'd just uh type in the letter a and hit enter and then wait for
49:22
it to install and finish and then you just close out your terminal window and and then that should fix that particular
49:29
error but you may also run into another error as I did because we're using the DF robot DF
49:38
Player Pro Mini MP3 player for this project we're having to include the DF
49:45
robot Library into our code and if that
49:51
library is not pre-installed on or into the Arduino IDE
49:57
we may receive an error such as this one I did install it before making this
50:04
video but I also uh removed it in order to show you what the error may show if
50:10
you have not installed it and then I'll show you how to install this particular Library so I'm going to
50:17
press the upload error here to upload the code to the
50:22
Arduino and then you can see what I get this error this compilation error that says Uh there's no such file or
50:29
directory for this uh particular library that we're trying to use here for the DF
50:36
robot Library so in order to install it the easiest way is just to go right here to
50:43
where it looks like these stack of books here and if we click on it we can see
50:48
that there's the LI we're in the library manager and in this window here you can see I've already I already have the
50:56
library typed in here so all you do is just type in this window here DF
51:03
robot uncore and we're wanting the DF
51:09
121s so I type in df1 121s and we can see it show up right
51:17
here this is the library that we want this DF robot DF
51:22
121s so all you have to do is just press install it'll install it and then once that's
51:29
done I'm going to go ahead and press this uh book icon again to get that out of the way and then I'll press the
51:37
upload Arrow again we see that it's compiling and uploading to the
51:44
Arduino and it's done uploading so now I don't have an error so if you ended up
51:49
receiving that particular error error so if you ended up receiving those
51:54
particular errors I hope that helps you out and then now we can continue on with
52:00
the rest of this
52:07
project okay I have a little bit closeup shot of everything right here we just
52:14
uploaded the code to the Arduino and right now I plugged in the power uh from
52:20
the 9vt battery supply and I haven't turned it on yet
52:25
because while I'm sitting here trying to talk it would keep going off playing ow sounds but I'm going to hook up the
52:31
power to it I have the pier sensor sitting here and I'll wave my hand in
52:36
front of it once I turn it on that way we can hear uh what it sounds like when
52:43
the owl sounds come out of the speakers here from the MP3 player and we can test out to see if everything works as we
52:50
want it to so I'm going to turn it on we can see all the lights
52:59
on and then I'm going to wave my
53:13
hand and we hear the owl sounds come out now I don't know if you can tell on
53:19
the camera but the audio coming out of the speakers sounds a little bit harsh a
53:27
little bit rough sometimes you can
53:34
hear kind of a crackling or a popping sound it doesn't
53:39
show up too well right now but there's a way that we can improve the sound
53:45
quality on the DF Player Pro and we're going to take that step
53:54
next okay now that we've got our code and we had everything running and we've
54:00
tested it out and everything seems fine and dandy our owl sounds are playing on
54:06
the speakers we may realize that there are some sounds coming from our speakers
54:13
maybe some crackling sounds or vibrations or something and that can be
54:18
kind of an annoyance but for this part I'm trying to move my light around here to get some
54:25
of the glare out of the way but for this part we're going to try to improve the sound quality of the DF
54:30
Player Pro and I've actually already set
54:36
up everything prior to starting to record here uh can you notice any
54:43
differences in the board anything different on the breadboard maybe if I can zoom in here a
54:50
little bit and get my trusty orange pointer
54:56
here what we can do to try to alleviate some of that sound Distortion in the
55:02
speakers is that we can add a 1K ohm or 1,00 Ohm resistor that's a brown black
55:10
red stripe resistor I have one right here and we can set uh one end of its
55:17
terminals at the RX pen and uh then connect the blue wire that we had coming
55:24
from pin two of the Arduino to the RX pin I've just shifted it to the other terminal of the resistor what I'm going
55:31
to do is I'm going to reset the camera so I can bring you in a little bit closer and then I'll explain it a little
55:37
bit better okay I have the camera up a little bit closer now and like I said in
55:43
order to reduce some of the noise to the speakers I've added a 1K Ohm resistor
55:50
here again that's brown black red and where we used to have this blue
55:56
wire this blue jumper wire that's connected to pin or to uh pin two of the
56:05
Arduino it used to run to the RX pin and you can't quite see
56:11
it in the camera but right here where this lead is
56:18
of the resistor that blue jumper wire used to go to this point on the breadboard which which runs in line with
56:25
the RX pin I'll just move this
56:30
orange jumper out of the way but where the resistor is now is
56:35
where the blue jumper wire used to be right at the RX pin now we've moved that
56:43
blue jumper wire to a point up on the res up on the breadboard here that's not
56:51
in line with anything else I happen to have this blue jumper
56:59
wire at Point B2 and I have as I said the
57:06
resistor one of the resistor leads now at the point that's in line with the RX
57:14
pin of the DF Player Pro and that happens to be at Point
57:20
A8 and the other end of the resistor or its other lead is in line with this blue
57:27
jumper wire now at A2 at Point A2 so having this 1kohm resistor here will
57:35
hopefully reduce some of that noise I will play a couple of Clips next that
57:41
will show the the differences in sound quality uh the first being what it
57:48
sounds like as we had it before we added the resistor and then what it sounds like
57:55
once uh I've inserted the resistor at uh the RX pin of the DF Player Pro in line with
58:04
the blue jumper wire that goes to pin two so we'll listen to the different
58:09
sound qualities real quick and if I just happen to arbitrarily choose a 1K Ohm
58:17
resistor I've noticed that online most uh images and information
58:24
that I found about resistor sizes place it to put in place in line with the RX
58:30
pin of these DF player Pros is usually a value of 1K ohm or around 1K ohm but you
58:40
could test out yourself different resistor values you can go smaller than
58:46
1K ohm that's most likely going to not
58:51
uh help out as much as this 1K ohm resistor would be a value less than it
58:57
but you can try higher values of resistances maybe such as uh you can try
59:03
a 10kohm resistor and see how that sounds I would just play around with it I I haven't personally done it I just
59:09
stuck with the 1kohm but you will tell in the two comparison video clips that I
59:15
will share with next that there's an obvious uh reverberation or Noise Within
59:24
the speakers when there's no resistor and there is a little bit
59:30
better quality in the sound with the resistor but there still is some noise
59:38
coming from the speakers even though I have a 1km resistor but it sounds a little bit better but as I said you can
59:44
play around with it as much as you like and just try it out I really encourage you to play around with it and and see
59:51
what works best for what you're looking for out of this project so we'll listen listen to those two audio clips in
59:59
comparison of the sounds coming from the speakers with and without the resistor and that will finish us up for part two
1:00:05
of how to make an albot the bird Intimidator again this was part two
1:00:11
making sounds in part three what we'll do is we'll end up adding some flashing
1:00:17
red LED eyes to our albot prototype so that when the pier sensor senses motion
1:00:24
the albot will start playing sounds and also start flashing its red LED eyes oh
1:00:30
and I just noticed we mustn't forget to put the orange jumper wire back and that just goes to pin TX to the DF Player Pro
1:00:40
and it the other end and the other end goes to pin three of the
1:00:46
Arduino just like that
1:01:25
okay the this has been how to make an albot the bird Intimidator part two making sounds next time we're going to
1:01:33
be adding the albot flashing red LED eyes so by the end of the next part in
1:01:40
this series we'll have the ability for motion sensing through our peer sensor
1:01:46
making owl sounds from our DF Player Pro Mini MP3 player and the two speakers
1:01:52
that we've attached to it and then we'll have the AL Bots red blinking LED eyes I
1:02:00
want to thank you for joining me for this fun project I hope you have enjoyed
1:02:06
it as much as I have and I will be seeing you in part three of the albot
1:02:13
project remember keep at it and stay motivated
#Music Equipment & Technology
#Computers & Electronics
#Consumer Electronics
#Audio Equipment
#Home & Garden
#Robotics