Up next in 10


Testing for Continuity Using a Multimeter
Show More Show Less View Video Transcript
0:00
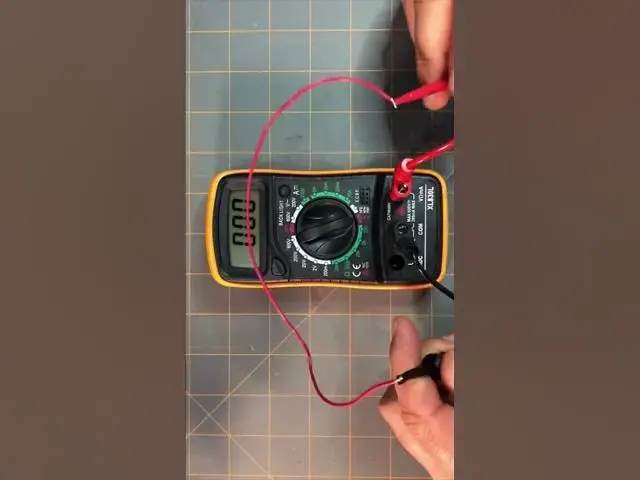
So to test for continuity, I need to
0:02
switch my multimeter
0:04
over to the continuity test symbol. And
0:08
when testing continuity, we want to see
0:11
if there's continual flow of current
0:13
through a section of the circuit or uh
0:16
through a component. For demonstration
0:18
purposes, I'm going to use this
0:22
piece of red wire.
0:24
So to test if there's continuity through
0:27
this wire
0:28
or if there's an ability for current to
0:30
flow from one end of the wire to the
0:32
other, I'm going to use the continuity
0:35
test on my multimeter.
0:39
I'm just going to hook the black lead or
0:42
the black probe of my multimeter to one
0:45
side of the wire.
0:48
And I'm going to hook the red probe
0:52
of my multimeter to the other end of the
0:54
wire. And you can hear that there's an
0:57
audible sound,
1:01
the beeping sound, the continual beeping
1:03
sound from the multimeter letting us
1:05
know that there is continuity through
1:07
this wire. current is able to go through
1:09
the wire unimpeded.
1:12
Now,
1:15
if I were to take my snippers and cut
1:18
this wire,
1:21
the sound goes off.
1:24
So, there's no more continuity between
1:26
this wire because it's no longer
1:29
connected. There's no longer the ability
1:31
for current to go from one end of the
1:33
wire to the other end of the wire.
#Computers & Electronics
#Science
#Electrical Test & Measurement